FAQ: A briefing log signed with a secure electronic signature
How to make sure that an electronically signed journal is signed with a secure electronic signature if it is represented by a question mark?
If an electronically signed journal is displayed with a question mark, it does not mean that the journal is not signed with a secure electronic signature.
You can make sure that the journal is signed with a secure electronic signature on www.eparaksts.lv, in the section “CHECK or SIGN”.
What if there is a question mark instead of a signature?
If a question mark appears instead of an electronically signed signature, you need to make sure that Adobe Reader is configured correctly.
Actions to be taken:
- Open an electronically signed journal in Adobe Reader.
- select the "Edit" section;
- Select the "Preferences" section;
- Select the "Signature" section in the menu on the left and click "More" button in the "Verification" section;
- In the "Windows Integration" section both menus must be checked, i.e., both "Validating Signatures" and "Validating Certified Documents".
Which means of electronic identification can be used to sign a log?
|
An employee can sign a briefing log using the following means of electronic identification: • eID card • Smart ID • eParaksts mobile |
Why did I fail to sign the briefing log using Smart-ID?
Signing a briefing log with Smart-ID requires a qualified Smart-ID account. This video (beginning from 2:20 min.) shows the sequence of actions required in order to have a qualified Smart-ID account set up - https://www.youtube.com/watch?v=Id2fDRkK6fs&t=140s
How do I know when to sign a briefing log?
|
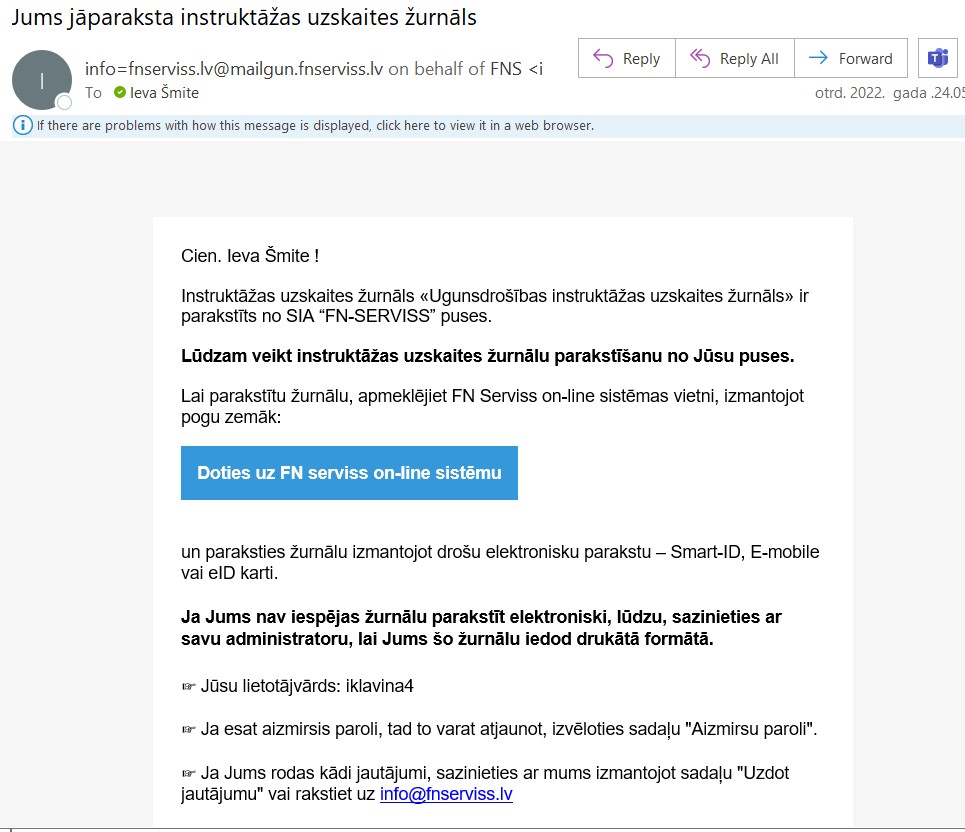
Whenever you need to sign a briefing log, you will be notified by e-mail. In order to sign a briefing log, you will have to log in to the FN-Serviss online system. |
Why do I get no notification and no verification code to my phone when trying to sign with Smart-ID, even though the system begins the countdown?
|
Such situations usually occur because the newly created Smart-ID account or an account set up when changing one's phone is of the Basic level, whereas the older qualified Smart-ID account has not yet been removed. Therefore, the system displays no error message, as it awaits a response from the qualified account, which is not active on the phone any more.
If your account level is above Basic, please let us know which level is displayed in the Smart-ID app menu, and we will address the situation more closely. |
How to sign the journal (step-by-step instructions)
- A training must be listened to and tests must be completed;
- The FNS admin signs the journals 2-3 times a day (on working days);
- As soon as the FNS admin has signed the journal, the system user (employee) receives a notification in their email that they need to sign the journal:
- Then, you need to log in to your profile, go to the "Training Journals" section (on the left side, highlighted in green):
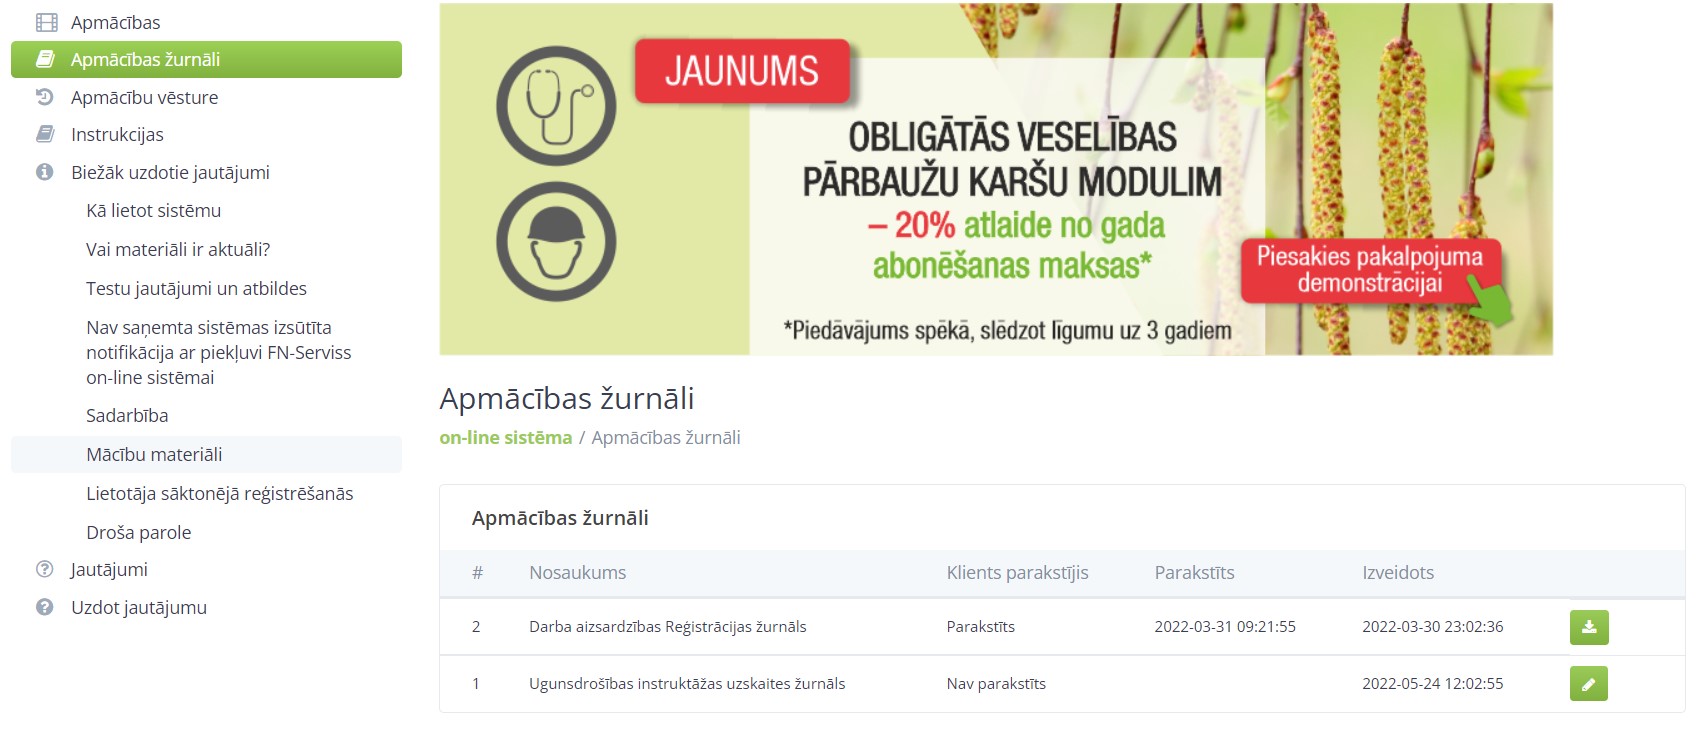
- And select the row that has a green icon with a pencil at the end:

- Clicking on the pencil opens the signature window:
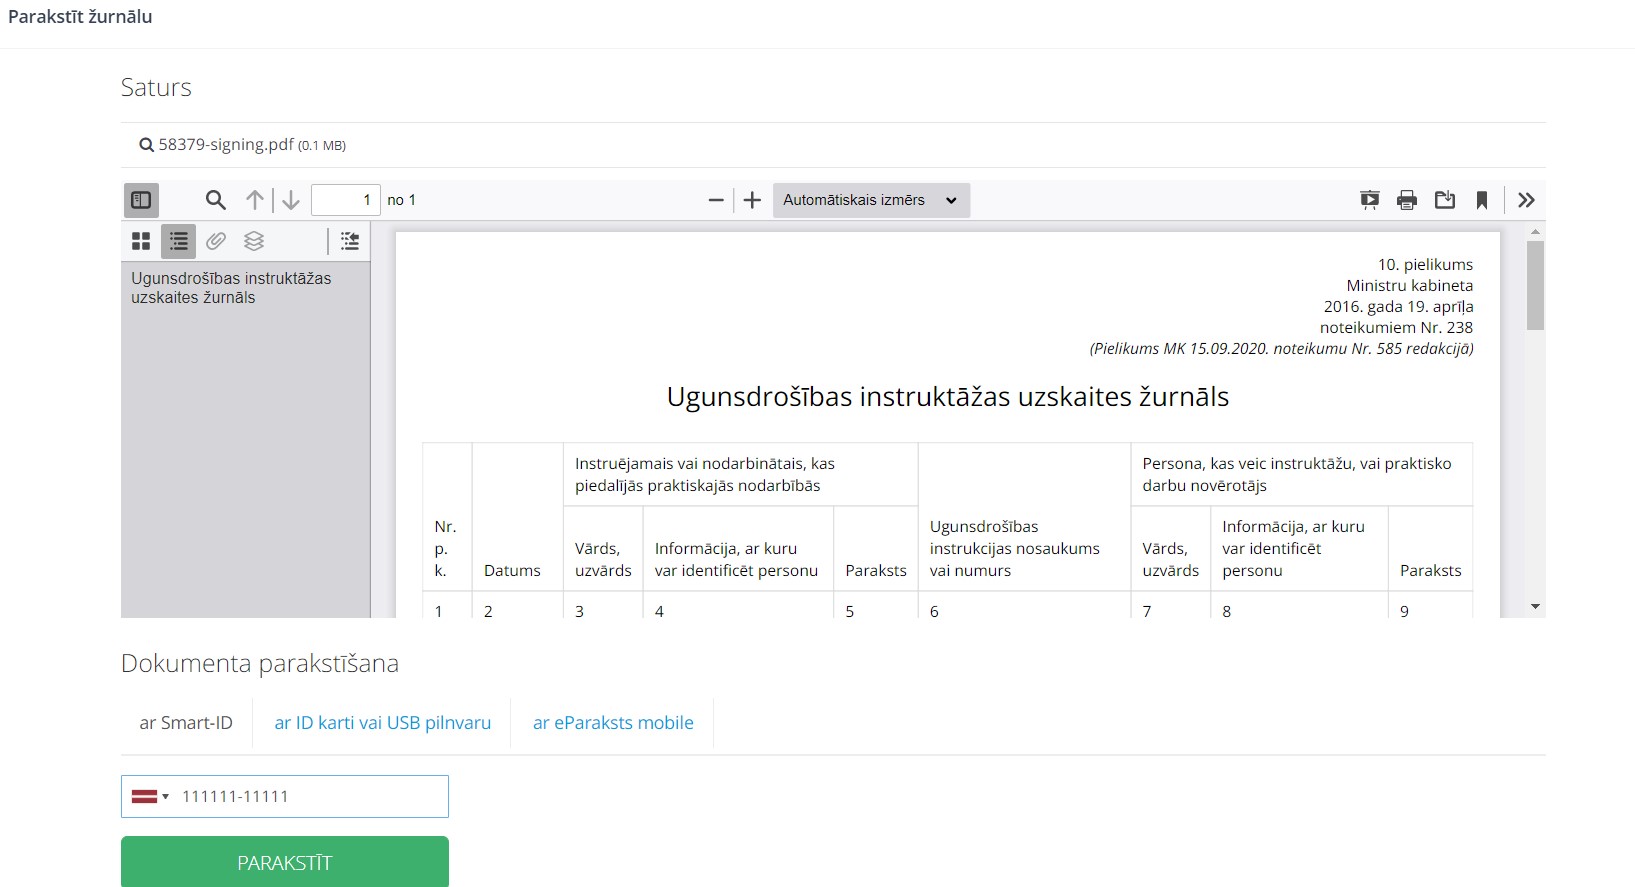
Scrolling to the bottom, three signing options appear – choose the most suitable one (in this example, it’s Smart-ID).
Enter your personal code and press "SIGN" and follow the further instructions (as you would when making bank transfers).
- Once the journal is signed, the “Client Signed” column should display “Signed”:

What to do if there is a question mark instead of a signature?
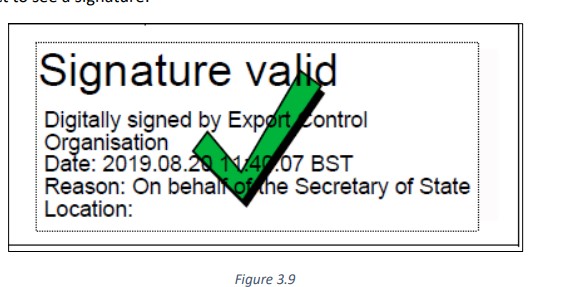
If you see a question mark instead of the correct e-signature (the green check mark) in the journal, you likely need to change the settings in the Adobe Reader software.
To do this, follow these steps:
1. Open the relevant journal with Adobe software:
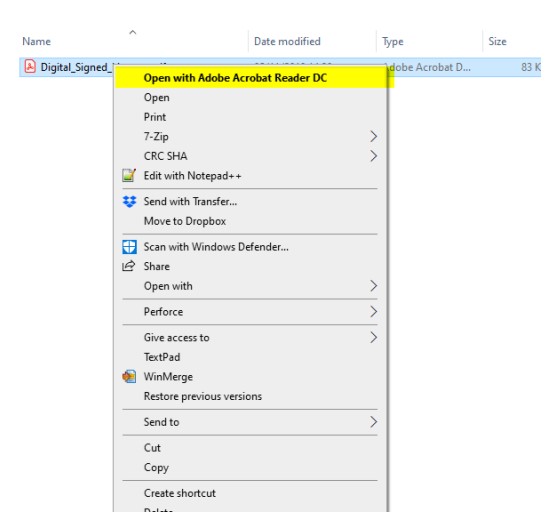
2. Move the cursor over the question mark, right-click, and select “Show signature properties”:
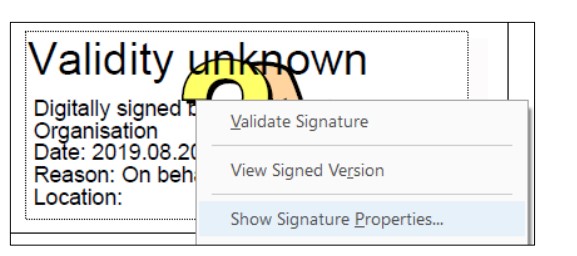
3. A dialog box will open where you should select "Show Signer's certificate":
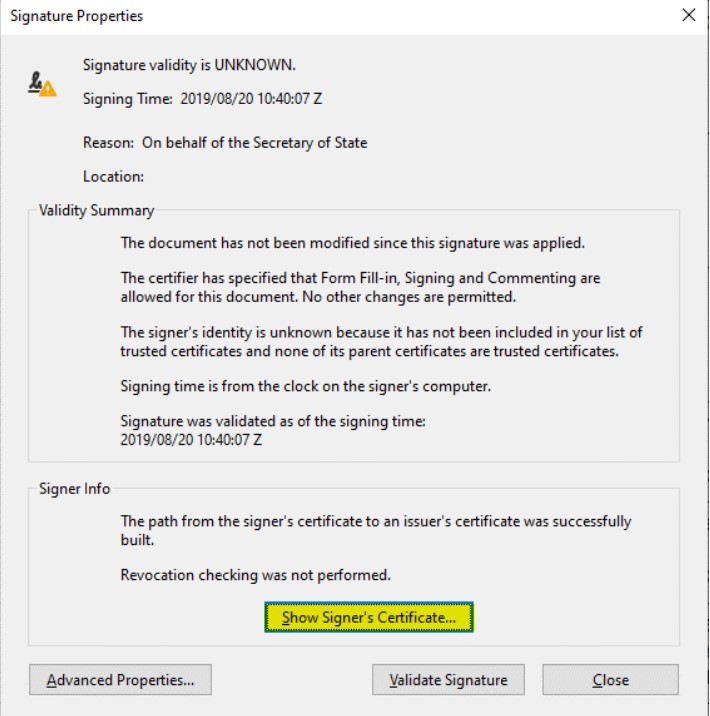
4. Then, choose the “Trust” section and make sure that the lowest-level certificate is highlighted in blue on the left. Then select “Add to trusted”:
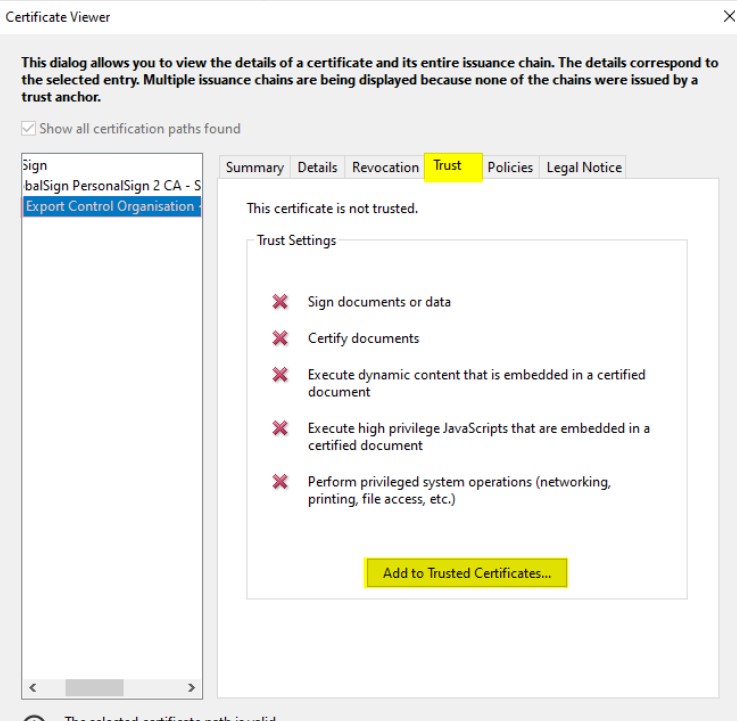
5. A new dialog box will open where you should select “OK”:
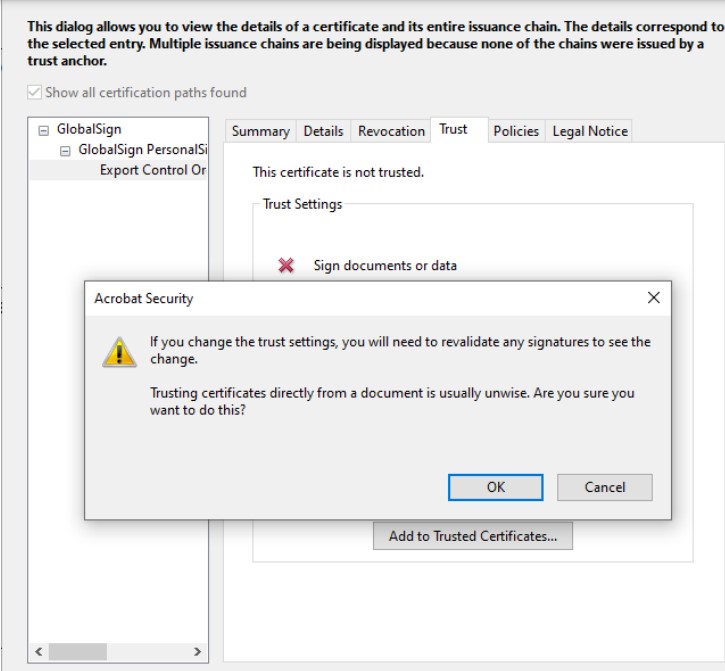
6. In the next dialog box, ensure that “Use this certificate as a trusted root” is checked:
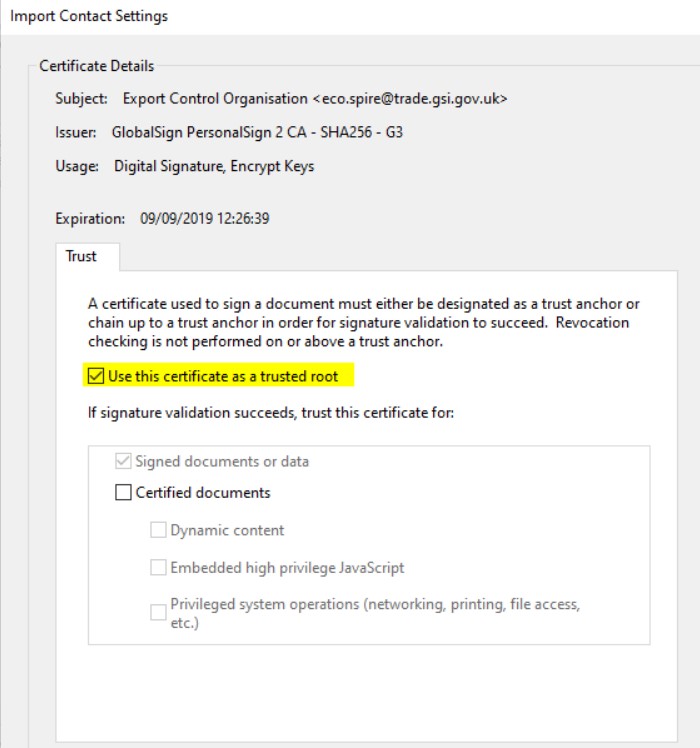
7. The dialog box shown in step 4 will appear again—just select "OK":
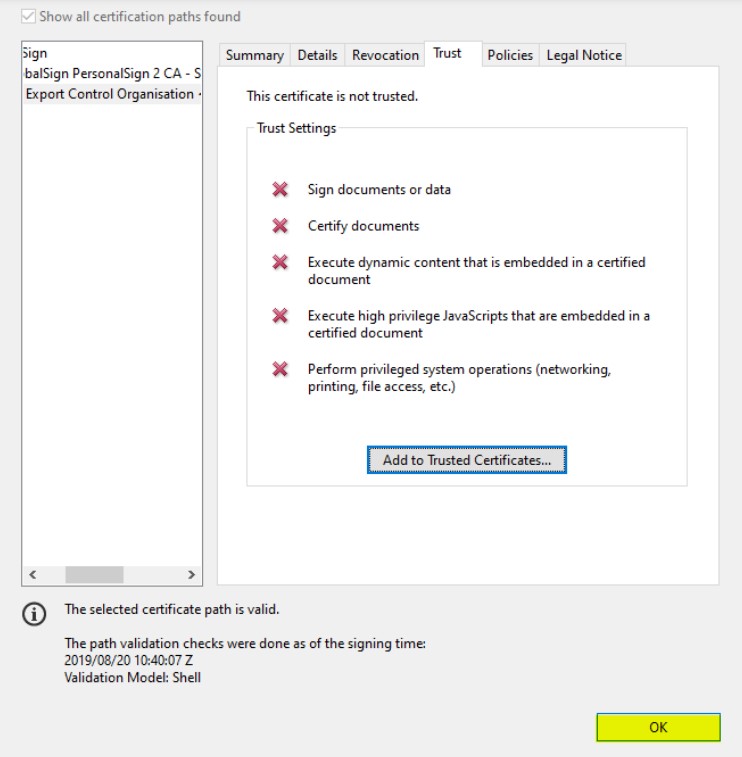
8. Finally, in the next window, select “Validate Signature” and then “Close”:
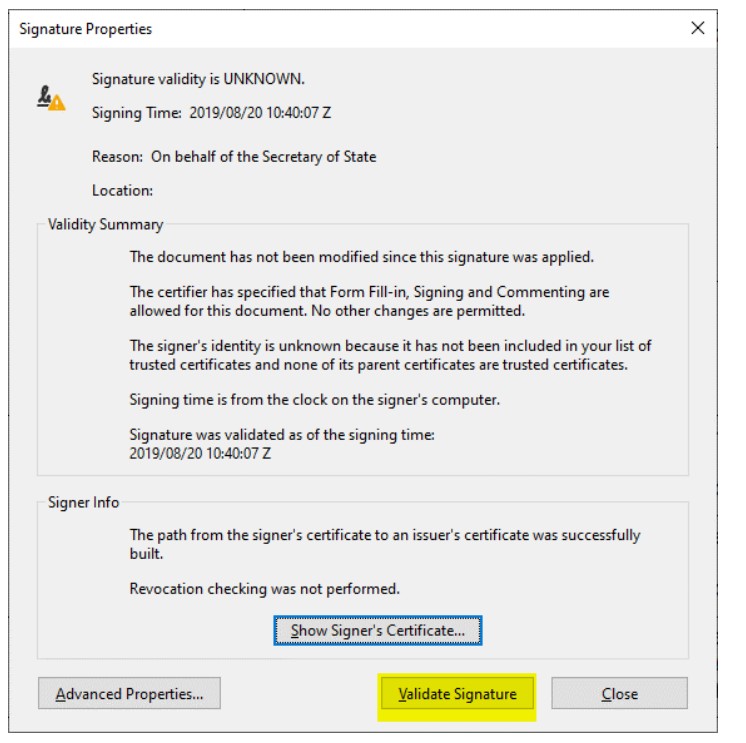
9. As a result, a green check mark should appear instead of the question mark:
